Hello all,
Welcome back to another week! Many of you are probably in school by now, but some might be starting this week. Good luck to all and best wishes for a great school year!
One of the toughest parts that I’ve found to the start of the school year in a self-contained or partial inclusion classroom is the scheduling. It’s especially difficult if you have students across multiple grade levels. There are so many moving parts!
My classroom has students across three grade levels in and out of the special education and general education classrooms throughout the day. How in the world does one schedule all these moving parts?! As the New Kids on the Block so eloquently put it: “Step by step”. In this blog post, I’ll take you through the process of how I schedule a whole day. Then, all you have to do is the same thing 4 more times!
Step 1
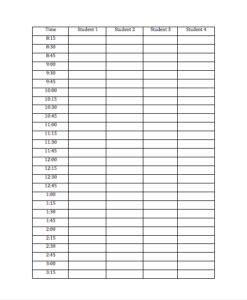
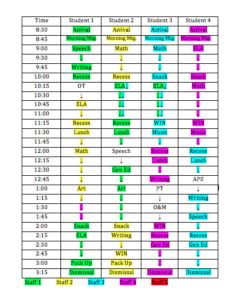
First, I make a table with all the students’ names across the top and times down the side. Most activities run 15-30 minutes so my increments are by 15 minutes but you can adjust as necessary.
Step 2
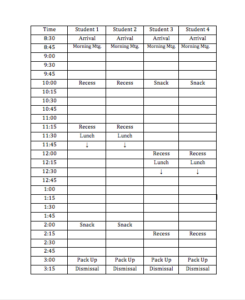
Next, I look at each grade level schedule to see when permanent things such as lunch and recess are. My students most often attend morning meeting in their general education classes so that gets added to the schedule as well as pack up and dismissal.
Step 3
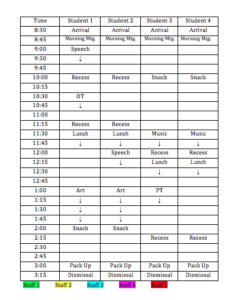
The next step is to add in any specials. This includes art, music, PE, and library.
Step 4
At this point, we sit down with service providers to determine when therapies will be happening. After a big meeting of the minds (or auction, if you will – “Can I get an OT slot at 2:00? PT opening at 10:00 going once, twice, SOLD!”) we have the next phase complete. The biggest suggestion I have at this point is to do your scheduling in pencil. This part, beyond any other, requires more changes than the others. Do yourself a favor and pencil things in so you can change them easily if need be.
Step 5
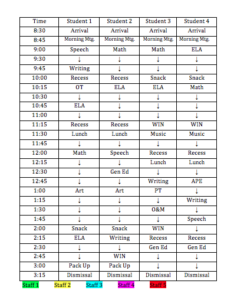
We’re almost done! Once lunches and recesses and specials and therapies have been scheduled in, then we can plug in academics. This very much depends on each student’s IEP and the specific minutes outlined for each goal area. For these purposes, I’ve included blocks for ELA, Math, and Writing. However, there are many other subjects that can get scheduled in, including social skills, life skills, cooking, etc.
Step 6
Now the fun part begins – color coding! We color code by staff member in my classroom. We designate each staff below the grid and assign them a color. That way, we can see who is working with each student at a glance. The delicate dance of who is working with who begins and we can decide where each color goes.
Step 7
You are SO close!! The last thing to always remember is to designate a lunchtime for yourself and your staff. We include these times on the schedule so there is no confusion for the staff as to when their lunch is and we can see with a quick glance who is at lunch at any given time.

Step 8
Reward yourself with a big bar of chocolate. Or a glass of wine. Or a pat on the back. Whatever your reward of choice, you’ve earned it!
There you have it, the 7 steps to creating a schedule for special education students. Of course, this is only one day. But once you get the hang of it, the other four go fairly quickly. I haven’t met a single teacher that hasn’t gone through many revisions of their schedule. Don’t be fooled into thinking that your first schedule will be your last. Things will change (sometimes by the day!), you may reevaluate which staff is working with which student or general education teachers will change their schedule. All of these come with the territory and you will have lots of versions. But year after year it will get easier.
How do you schedule your students? Do you color code by student? Staff? Do you use Excel? Google Docs? How do you reward yourself for getting them finished?
Happy scheduling,
![]()

